8.8.15
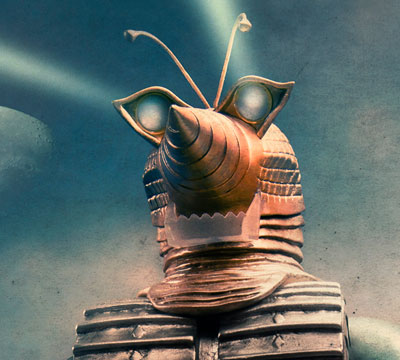
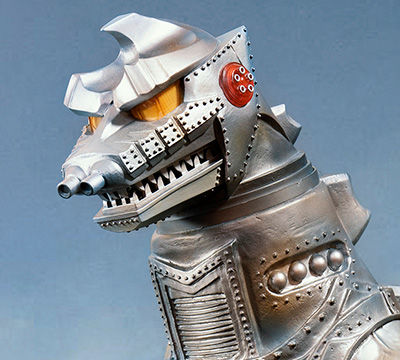
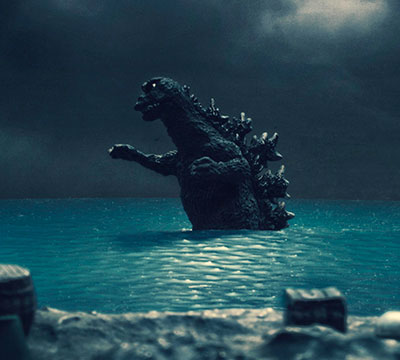
Growing up Saturday afternoons were all about Godzilla. My memories were sheered with iconic scenes from the Showa series. There was no scene more memorable than that of Godzilla and King Caesar surrounding MechaGodzilla. Now that I’m full invested in Godzilla toy photography, my appreciation of and fascination with tokusatsu increases everyday. My goal has been to recreate my favorite epic moments. It’s like recreating the Saturday afternoon memories.
We often speak of taking photos but professional photographers will say making the shot. Each photo shoot is a new lesson and test in the art of toy tokusatsu. The goal is to capture the essence of an iconic scene by matching the film sequence’s perspective, focus, and composition as best as possible. This is easily said than done. First, my toy photography is limited by the items in my collection. Often I have to find the right figure and this involves costs. Second and as important as the first is having the right elements for the foreground, midground, and background in the right size and scale. Third, creativity with these elements is required. Determining the picture ratio is important. Whether a shot is 16:9 or 4:3 will determine how much scenery is needed. If some elements are not available, position what you have strategically to convey the essence of the shot.

For a long time, I avoided shooting my X-Plus figures because of their larger scale. I had been preoccupied with small scale Bandai and Iwakura figures. But yesterday, I assembled my largest scene to shoot the X-Plus 25cm Godzilla, King Caesar, and MechaGodzilla. The scene extended well beyond my desk onto another table. As usually my computer screen provided the necessary background. However, the dimensions of my screen would not come close to the 16:9 ratio and perspective of movie scene. The space between the foreground, midground, and background was at least 12 inches between each. But the final shot was square and the distance between each kaiju was not capture in the shot. The shot was crammed and didn’t allow for creating tokusatsu special effects for MechaGodzilla and Godzilla. Although the shot came out okay after post-production, I was resolved to take a better shot in the morning. But this meant to go big or go home.

First shot


I had a restless night because I was ready to make the shot. It was going to take everything I had and that included my big screen TV in the adjacent room. It would open up the scene closing to a 16:9 ratio and provided the depth of field from the movie still. Lightning was tricky and does not match the original. It was difficult controlling the sunlight coming through three windows. The sunlight was too strong on the right side. So I decided to diffuse it as much as possible. But the light source would appear to come from the left. The reduced scale of King Caesar in the background worked out better. Godzilla back dorsal fins and arm would fit in the shot with a little room to spare just like the movie still. After going through two rounds of shots, enough came together for a good shot.

Second shot